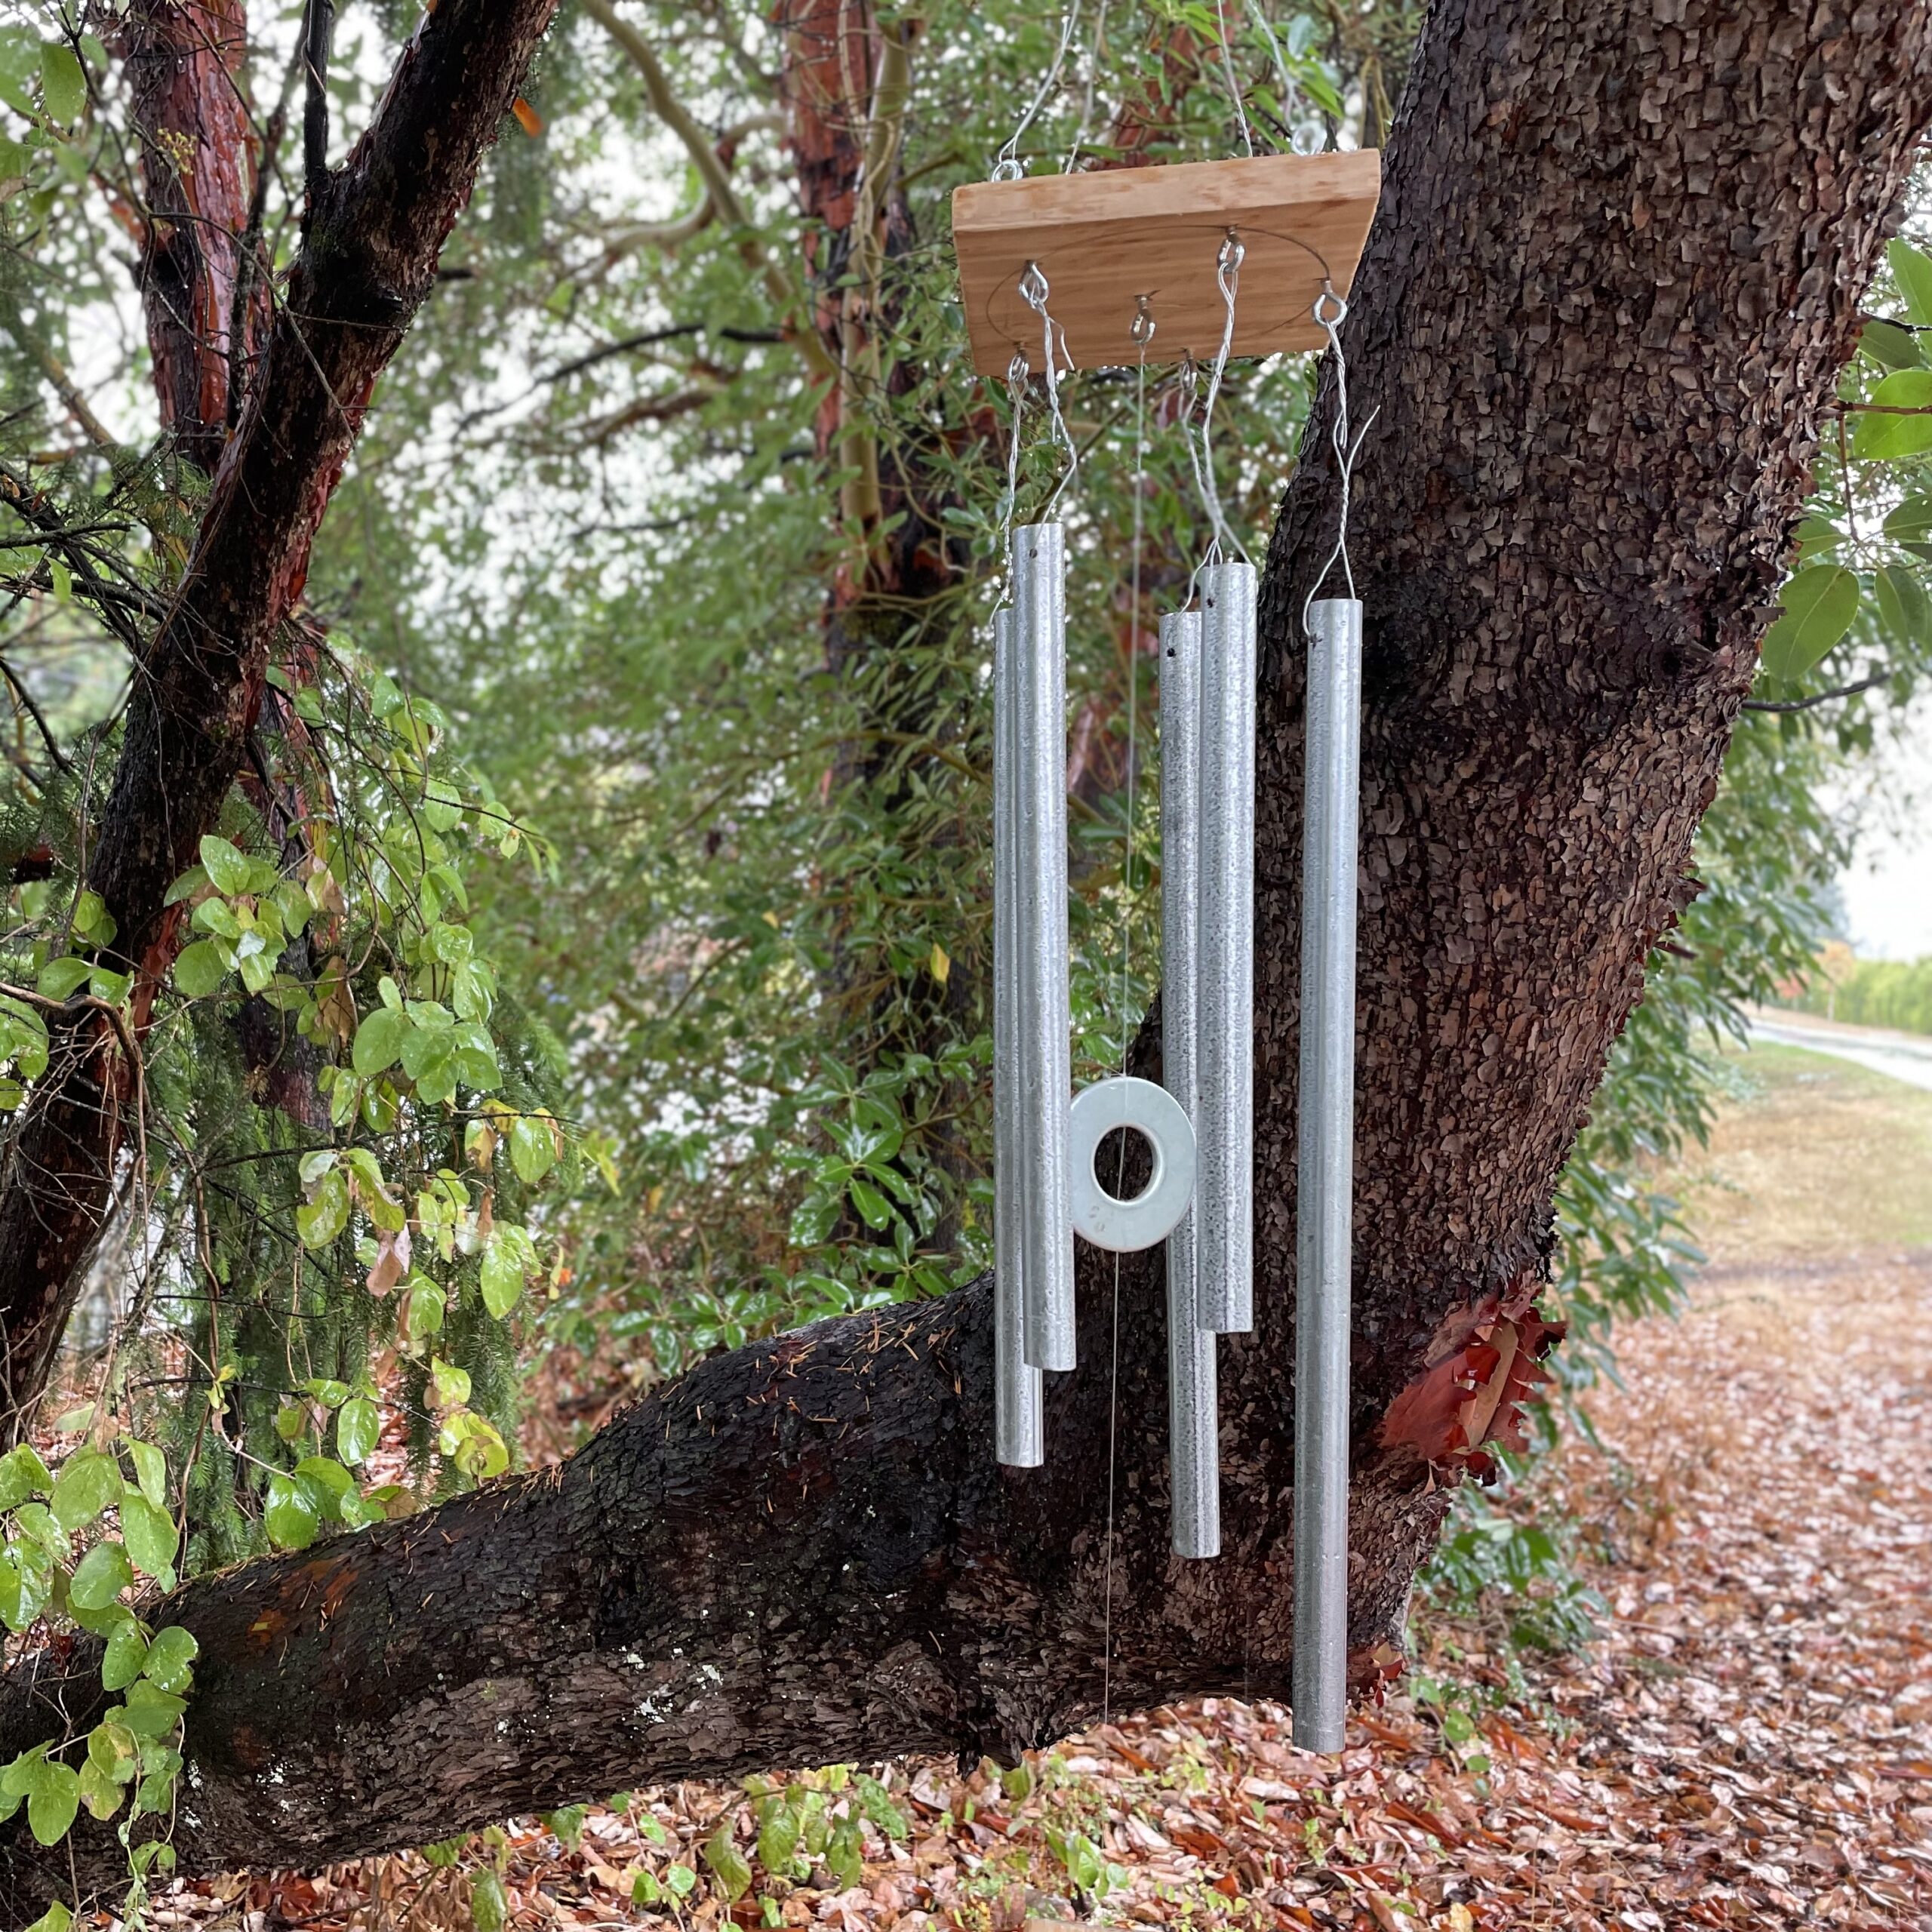


Wind chimes can be a wonderful addition to a patio or garden, as well as a fun way to learn the science of sound through experimentation. Play with different types of strikers (the object on the string that hits the pipes) to see how it changes the quality of the chime sounds.
This project requires cutting and drilling both wood and metal. Makers who do not have prior experience with saws or drills will need more time and 1:1 help from an adult. It is an ideal project to make in pairs, with one person holding the pieces steady while another does the drilling or cutting.
For beginner makers, provide length templates for marking the 5 pipe lengths accurately. A pipe cutter is an easy tool to use to cut the pipe to length, but a hacksaw can also be used. Advanced projects could include bending the conduit into unique shapes with a pipe bender!
The 5 lengths of pipe in the cut list are carefully calculated to make pleasing tones relative to each other, in this case specifically for ¾" steel EMT conduit, commonly used by electricians to lead wires through buildings. If you want to use a different type of pipe or different dimensions of EMT, research to find out what lengths of pipe make pleasing tones. Wind chime enthusiast Lee Hite has created open-source spreadsheet calculators (available online) to help predict those exact dimensions. Use calipers to determine the inner and outer diameter of your pipe.
Explore Related Trades Careers: Electrician
Tools & Materials
Material List
- 4' - 3/4" diameter EMT steel electrical conduit pipe
- ~50" tie wire, or similar
- 6" x 6" x 1" Red Cedar or similar (ie, a 1x6 board would work)
- one 3" washer
- 3" x 4" piece of 1/8" plywood or similar found object
- sandpaper (120 grit)
- ten ~3/4" screw eye hooks
- ~70" fishing line, ~50lbs gauge
- one 1" keychain ring, or similar
- clear waterproof finish (varnish or similar)
Optional
Tool list
- safety glasses
- ear protection
- work gloves
- dust mask
- measuring tape
- felt pen
- pencil
- vise
- speed square
- pipe cutter or hacksaw
- punch
- hammer
- hand drill
- 1/8" twist bit (for metal)
- wire cutters
- pliers
- backsaw
- compass or found round object ~4" in diameter
- twist bit (same diameter as shaft of screw eye hooks)
- scissors
- mitre box (90°)
- c-clamp or similar
- geometry protractor
Optional
Procedure
-
Review the cut list for the steel EMT, and double check your understanding of how to measure the following: 6 13/16”, 7 5/8", 8 5/16”, 9 1/16”, 10 3/16”
-
Use your measuring tape and felt pen: measure from the end of one long length of EMT and mark the longest pipe length from the cut list.
-
 Cut your pipe with a pipe cutter or secure it in a vise and cut it with a hacksaw. Safety glasses and work gloves are required for this procedure.
 -
Use coarse sandpaper to remove the burrs on the inner and outer edges if necessary.
-
 Repeat the above steps and cut the remaining 4 pipes on the cut list. You should have 5 in total.
 -
 Start with your longest pipe: measure and mark an “x” or dot 1” from the end.
 -
Secure the pipe in the vise and place the point of your punch on the 1” mark. Tap the other end of the punch with a hammer to make a small indent. This will help keep the drill bit steady in the next step.
-
 Use the hand drill and metal twist bit to make a hole at the punch mark and continue straight down through the second wall of the pipe. Try to keep your drill at a 90° angle to the surface of the pipe.
 -
Repeat the marking, punching, and drilling steps for the remaining four pipes.
-
 Measure and cut five 10” pieces of wire with your wire cutters.
 -
 Pass a piece of wire through the holes, then use pliers to twist the ends like a giant twist tie until you reach the ends of the wire.
 -
Repeat for all pipes. Set your pipes aside until the assembly steps.
-
Before you start, check that the end of your board is square using your speed square. If needed, secure the board in a mitre box with a clamp and cut a slice off at 90°.
-
Cut a square using your cedar board. Measure the width of the board, then take that dimension and measure from the end and make your cut mark (if using a 1"x6", the piece should be approx. 5 ½" x 5 ½”).
-
Draw a line across the board at the mark with the speed square.
-
 Secure the board in a vise or with a c-clamp (or in a mitre box). Use a backsaw to cut along the line.
 -
 Use a straight edge and a pencil to lightly draw diagonal lines from corner to corner on BOTH sides of your wood square.
 -
On one side, draw a dot at the centre where the lines intersect. This will be the BOTTOM of your suspension platform.
-
 Use a pencil and a compass, or trace a round object, creating a big circle centred around the dot. Make sure to leave at least ½" of wood around the edges.
 -
 Along this circle, mark out 5 equally spaced dots. Math Hint: to divide a circle into five equal parts, 360° ÷ 5 = 72°; use a protractor and pencil to draw these radii from the centre to find the dot spacing.
 -
 On the other side of your suspension platform (the top side), make 4 dots on your diagonal lines, each ¾” in from the corners.
 -
 Make pilot holes in your suspension platform: mark your twist bit with masking tape ½" up from the tip, then drill all marked dots on your wood square with holes ½" deep: 4 holes on the top, 6 holes on the bottom.
 -
Measure and mark a 3”x4” piece of plywood or a thin offcut of scrap wood and cut it out with your backsaw. Alternately, find a thin object such as a piece of acrylic in a similar dimension.
-
 Measure and mark a dot in the middle, about 1” down from the top of your sail.
 -
Place your sail on a scrap piece of wood and drill through the marked dot with the pilot hole twist bit.
-
 If needed, smooth the edges and faces of your sail and suspension platform with sandpaper, and sand away any pencil marks. Use a dust mask and gloves to protect yourself from the sawdust.
 -
Optional: apply clear wood finish to your pieces and allow to dry. This may not be necessary if you are using a rot-resistant wood such as red cedar, or you want your wood to develop a weathered patina over time.
-
 Screw eye hooks into all 10 holes in your suspension platform. Use pliers if the screw eye hooks are hard to turn by hand.
 -
 Loop the wires on the pipes from step 12 onto the 5 outer screw eye hooks on the bottom of your suspension platform and twist back to secure. Wear gloves to protect your fingers while twisting wire.
 -
 Measure two lengths of 15” fishing line, fold them in half, and tie the middle around the keychain ring.
 -
 Tie the ends of the fishing line to the 4 screw eye hooks in the top of your suspension platform, making sure they are all the same length. Cut the ends short.
 -
Cut a 20” piece of fishing line; tie one end to the bottom middle screw eye hook of the suspension platform, and one end to the 3” washer. This will be the striker, or the piece that hits the pipes to make the noise. Tie it so that the striker hits low on the pipes if you can (within 1” of the bottom of the shortest pipe). Cut the ends short.
-
Cut a 15” piece of fishing line: tie one end to the washer and one through the hole in your sail. Cut the ends short.
-
 Find a windy place to hang your wind chimes and enjoy!
Prepare your pipes
Make your suspension platform
Make your sail
Optional
Assemble your wind chimes
Extension Challenges
- Experiment with using different materials for the striker instead of a metal washer: What does a wooden striker sound like? Does a plastic or rubber striker work?
- The pipe lengths are calculated specifically for ¾" steel EMT conduit to make a pleasant-sounding chord when they chime. If you want to get even more technical, and make the most of the vibration and resonance, drill the holes so that the top edges are 22.4% of the pipe length down from the top. Calculate the distance for the individual length of each pipe.
- Instead of wiring the pipes directly to the screw eyes, use fishing line between the screw eyes and the tie wire so the pipes dangle more freely.
- Use a bandsaw to cut a 5” diameter circle for your suspension platform instead of using a square.
- After the holes are drilled, spray your pipes with a protective metal spray paint, such as Rustoleum, to give them a different colour and prevent them from oxidizing or rusting.
- Make a set of copper wind chimes. Fit and solder a copper cap on the end of each pipe and drill a tiny centre hole. Hang the pipes by threading fishing line through the hole with a washer bead stopper. Search online for Lee Hite’s calculating spreadsheets to help you determine the ideal pipe lengths.
- Make a set of rebar wind chimes. Notch the ends at 1” with a mill file or hacksaw and make a loop of tie wire on the tip. Suspend them using fishing line.