
This copper keychain is a simple, beautiful, and customizable project idea. Use a set of letter metal stamps and a hammer to imprint a name or sentence into your keychain.
Head on over to the Learnary to find the Copper Keychain Kit.
Head on over to the Learnary to find the Copper Keychain Kit.
Tools & Materials
Material List
- 18-gauge copper piece - approximately 2.5 x 15 cm (1x6 inches)
- Sandpaper (5 different grits)
- Steel wool
- Soft cloth
- Keyring and clasp
- Copper polish recipe
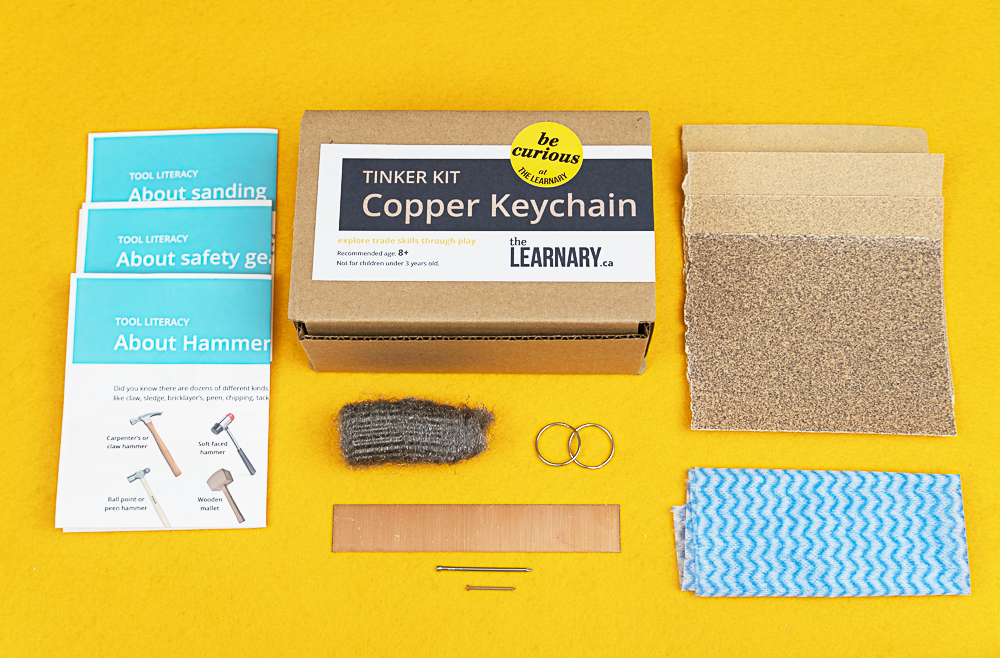
Copper Keychain kit contents:
Tool list
- ruler
- Hammer
- Mask
- Safety glasses
- heavy work gloves
- Block of scrap wood (eg, 8" of 2x4)
- Metal snips
- Found metal objects for stamping and marking the copper
- letter metal stamp set
- Heat gun or blow torch
- Clamp
Optional
Procedure
-
Your kit comes with one piece of copper. If you would like a smaller size or a different shape, use a pair of metal snips to cut the copper. You can also cut your strip in half to make two keychains. Metal snips are very sharp. Make sure you have an adult around to help – and wear gloves!
-
The edges of your copper will be very sharp. Wearing gloves and a mask, use the roughest piece of sandpaper to sand all the edges and round the corners of your piece.
-
With a pencil and ruler, measure and mark a dot in the middle of the copper strip, approximately 1 cm from the end, as shown in the photo. This will be where the key ring is attached.
-
Place your block of wood on a work surface that you can hammer on (check with an adult if you’re not sure). Place your copper on the block. Use the larger nail in your kit and a hammer to make a hole through the copper by hammering the nail through the copper at the mark. Once you are all the way through, pull out the nail and turn over your project. Hammer the nail through in the same place from this other side. You may need to do this a couple of times to make a good hole. Use the rough sandpaper to get rid of any sharp bits around the edge.
-
Now for decorating! There are lots of ways to mark copper. You can use the sandpaper and nail to scratch an image or make indentations. Another piece of metal will work too. Using the flat head of a hammer or the end of a screwdriver, you can pound a pattern into the metal (if the metal curls up, just turn over and hammer flat again). You can also look around and see what you have that you think will make marks. Be creative and have fun!
-
When you are done marking, sand your piece with a fine grit sandpaper and then the wire wool, in a circular motion. This will remove any colour change, highlight the hammer work you have done, and give a clean buff to the surface. Double check for any rough bits and sand these too.
-
Finally, apply some copper polish (or mix up a small amount of our simple DIY copper polish recipe available with the kit) with the cloth and give your copper a good shine. Time will give it a lovely dark colour, called a patina, or you can shine it up again whenever you like.
-
Thread your key ring through the hole. Add some keys, you’re ready to go!
Extension Challenges
- Ask an adult with experience using a torch for this. After you have made all the markings you want in your keychain, place it on a piece of scrap wood or a flame-proof surface and wave the torch flame over it to change the colour of the copper. Please be careful! The piece will be hot afterwards so let it cool before moving to the next step.